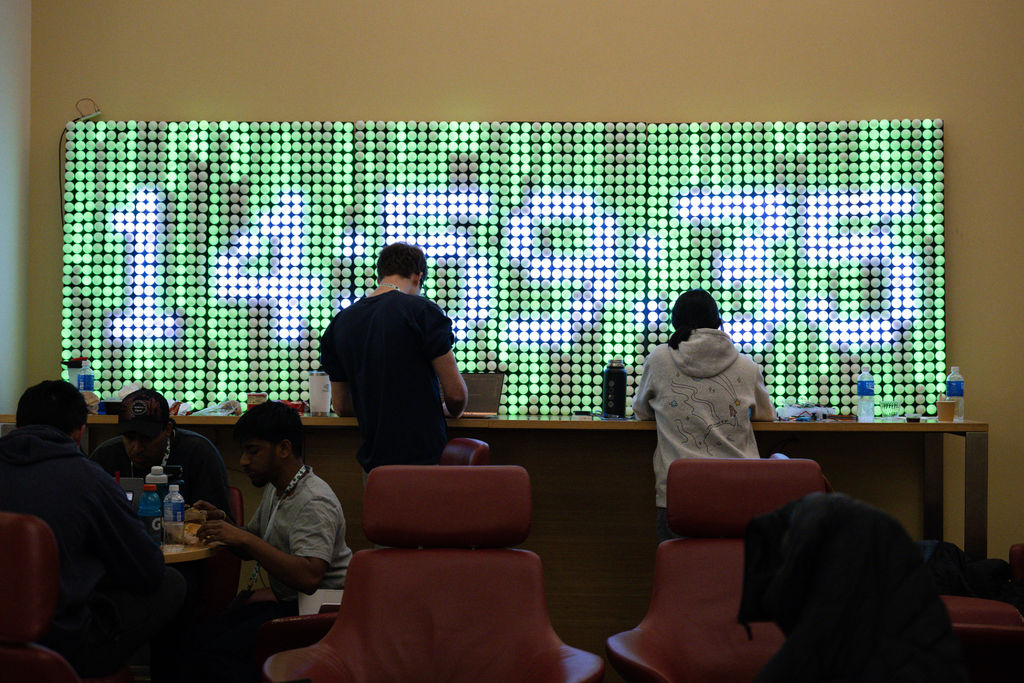
Countdown Timer
2,352-LED display for TreeHacks
Every year, the TreeHacks team works on these projects called "builds" while putting the event together. Think of these like our mini hackathon projects we get to work on since we don't get to participate in the actual event.
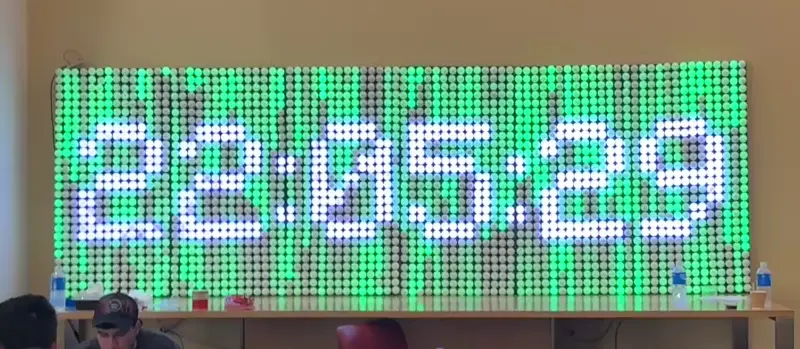
In recent years, TreeHacks always builds a giant timer, counting down to when hacking ends.
This year, Shobhit Agarwal, me, and the rest of the team spent hours building a 2,352-LED matrix display.
Based on other projects online, it seemed incredibly daunting — many other matrix builds faced issues with power delivery, surges burning out LEDs, and challenges controlling thousands of lights with a controller.
We didn't even come across any other projects using as many of these WS2812B string light LEDs at this scale. We got it working, and here's how.
Design
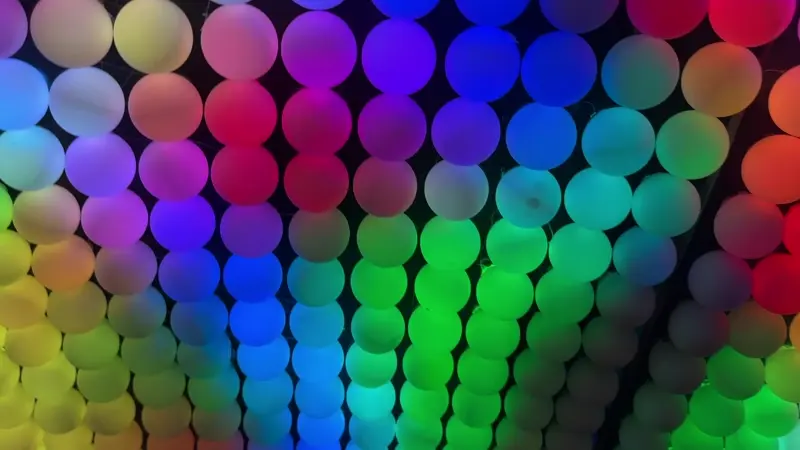
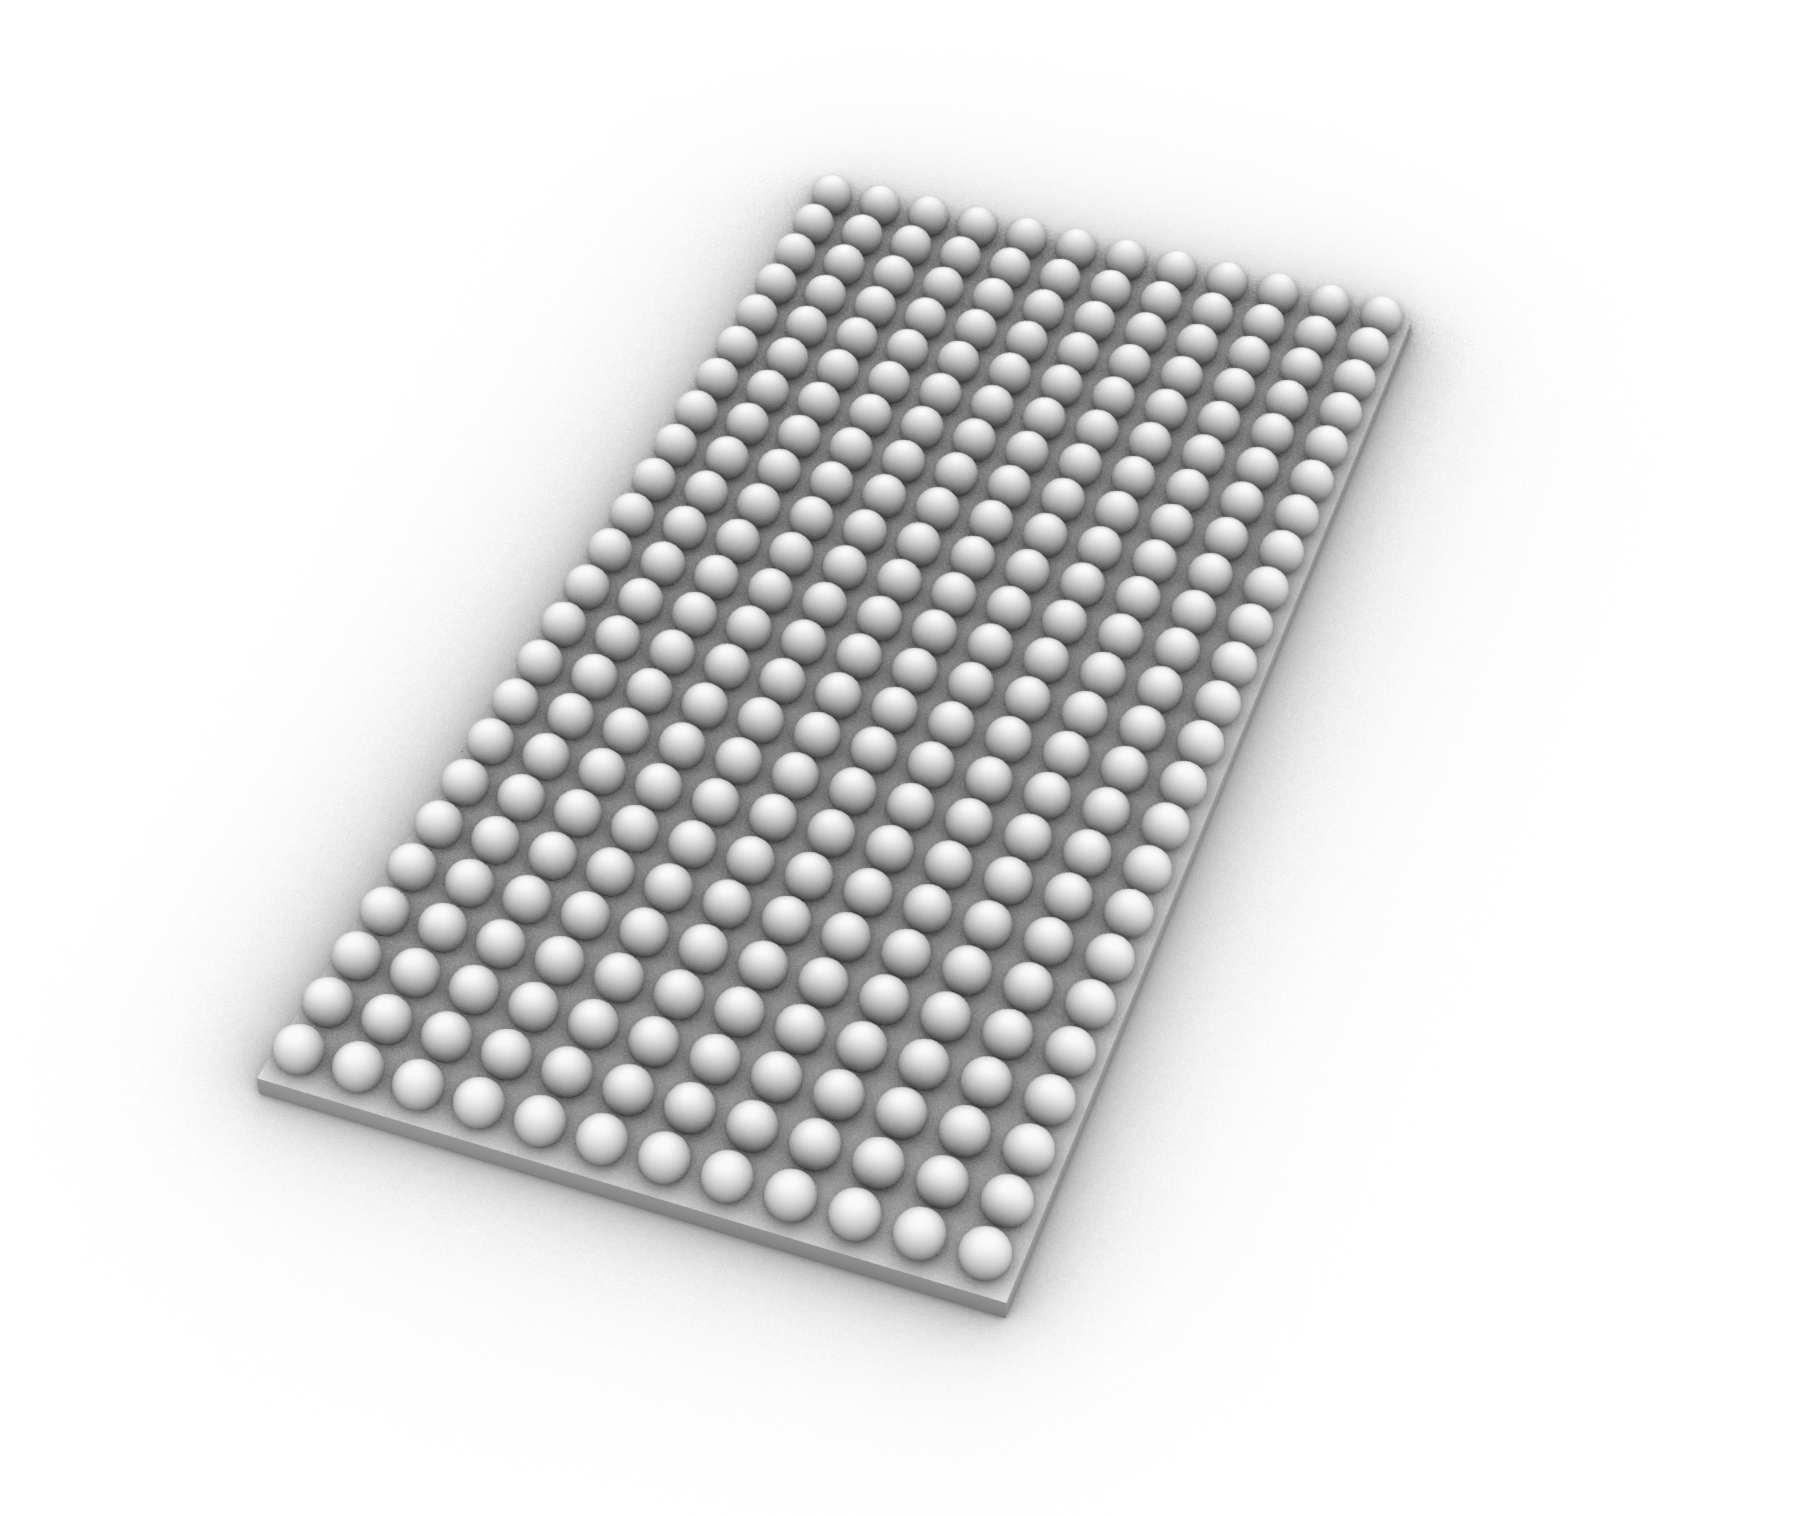
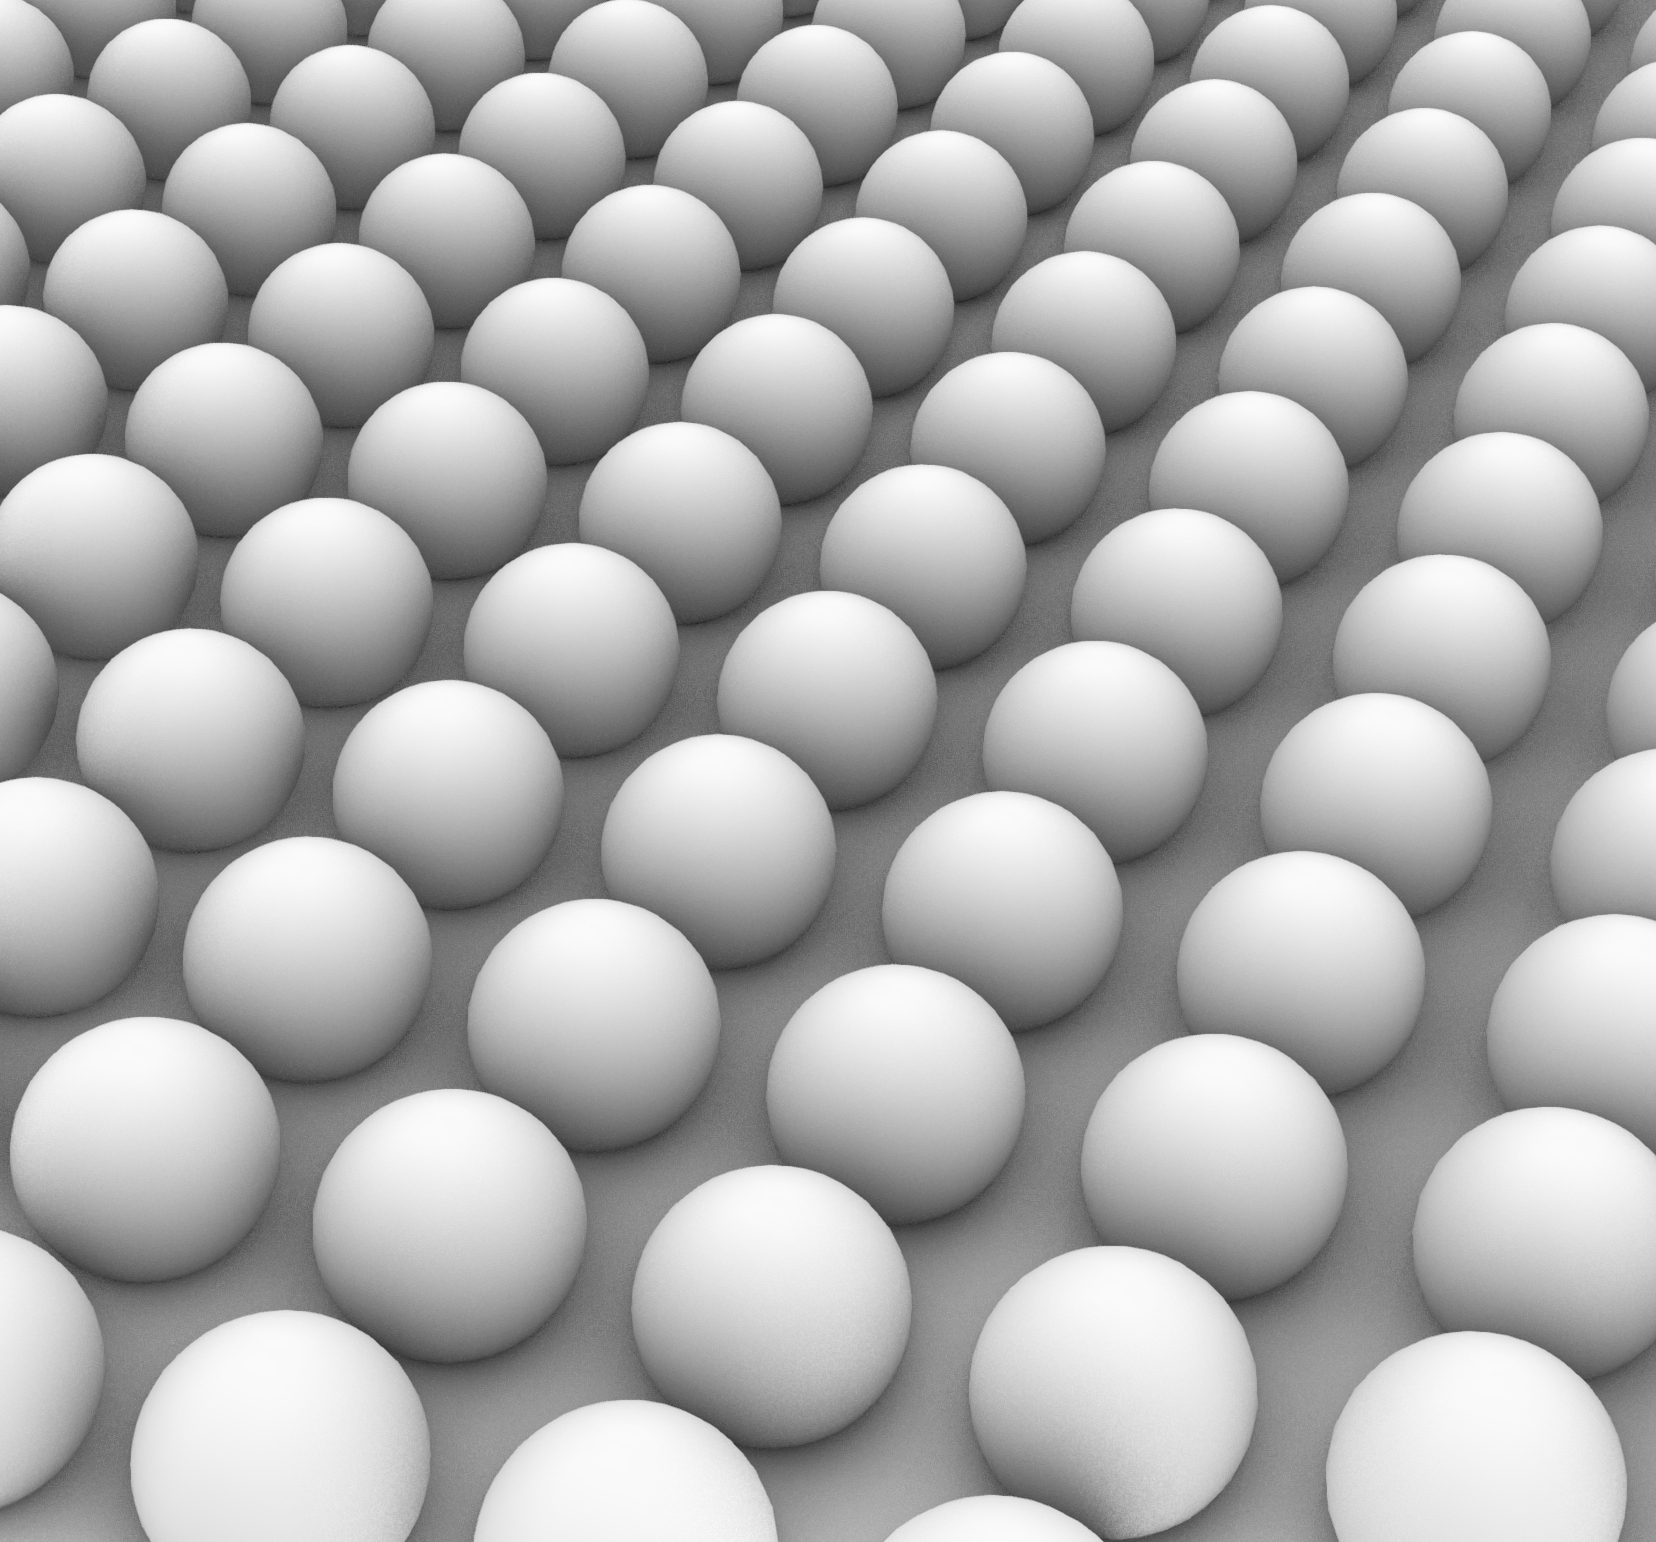
Inspired by Bitluni's LED wall builds, we used ping pong balls to diffuse individually-addressable LEDs.
Bitluni used metal, but that was expensive, and we didn't have the tools needed to punch out holes. Instead, we decided to use plywood for the panels.
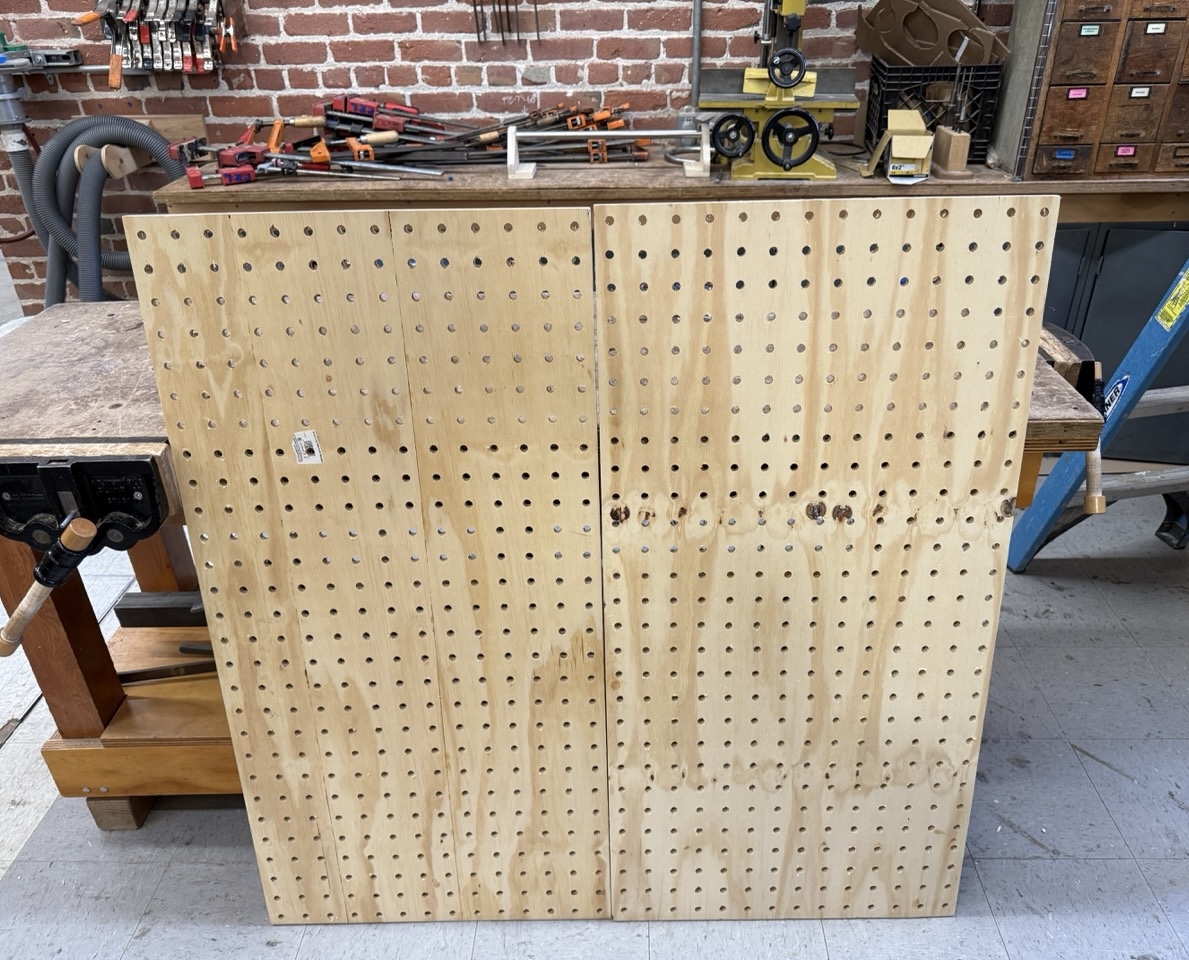
The panels were 2ft x 4ft each, and we initially planned to use 8 of these, but ran out of time and used 6 instead. Each panel was 14 x 28 LEDs, with a 392 LEDs/panel.
Woodwork
We had to drill holes into the wood to space the LEDs apart from each other at the perfect distance for the ping pong balls. The main challenge was — how do we drill ~2800 evenly-spaced holes?
Bitluni had measured and marked each spot, but that would take a long time. Luckily, we found a wood CNC router in Stanford's PRL! We put the design in and started cutting.
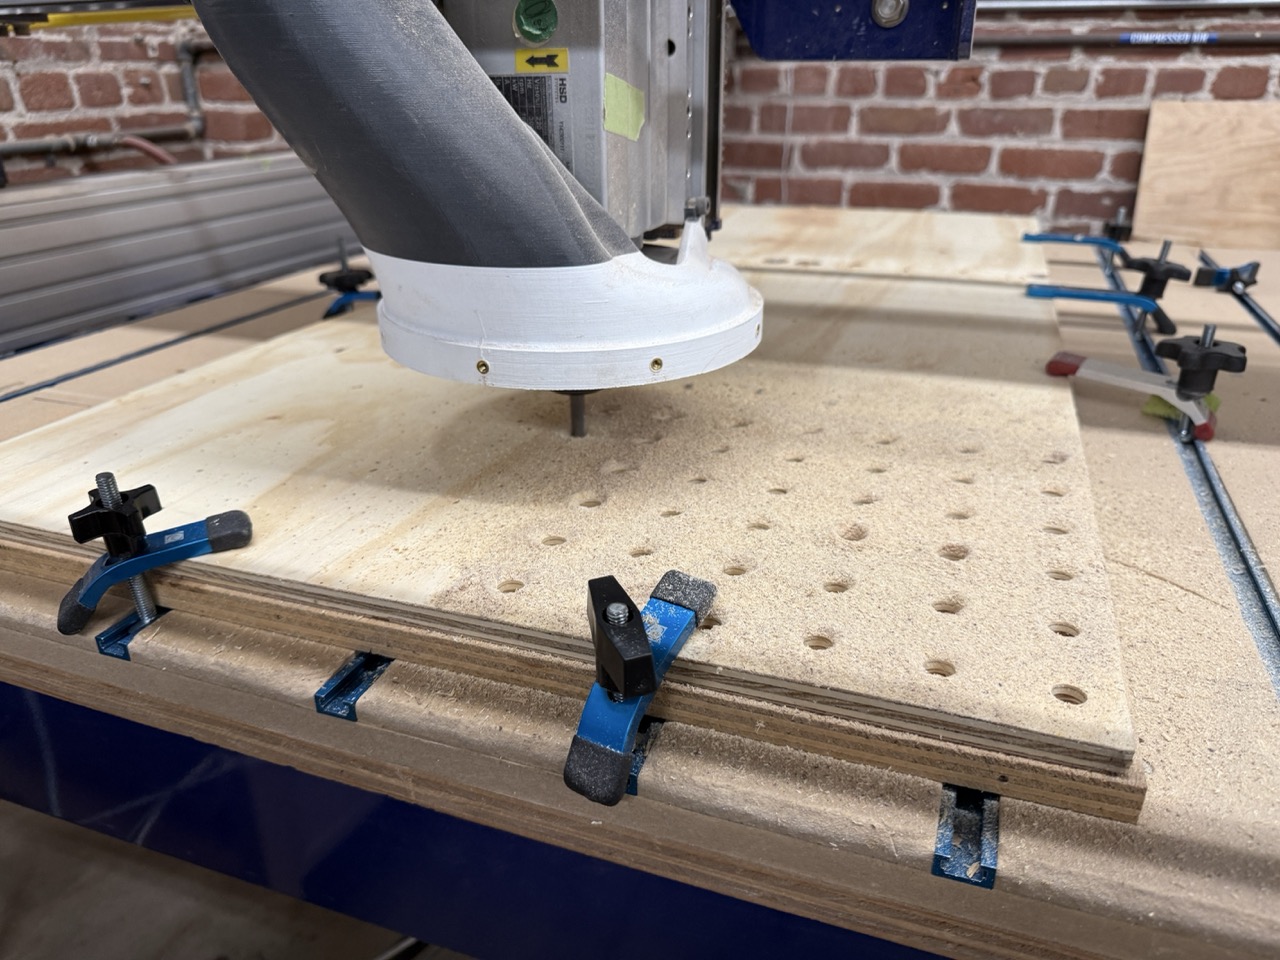
Then we faced a major problem: the shopbot was cutting at a rate of 30s/hole.
It would take 28 hours of straight cutting to drill every single hole. With the shops only open during certain hours, and the machine needing constant supervision, this was not an option.
(I barely have enough attention span now because of reels, no way I could sit through this!)
We tested with a hand drill, and at max locking in I achieved a rate of 3s/hole. Practically, it took maybe 30-45 min per board. (our drill bit was about 7/16th in)
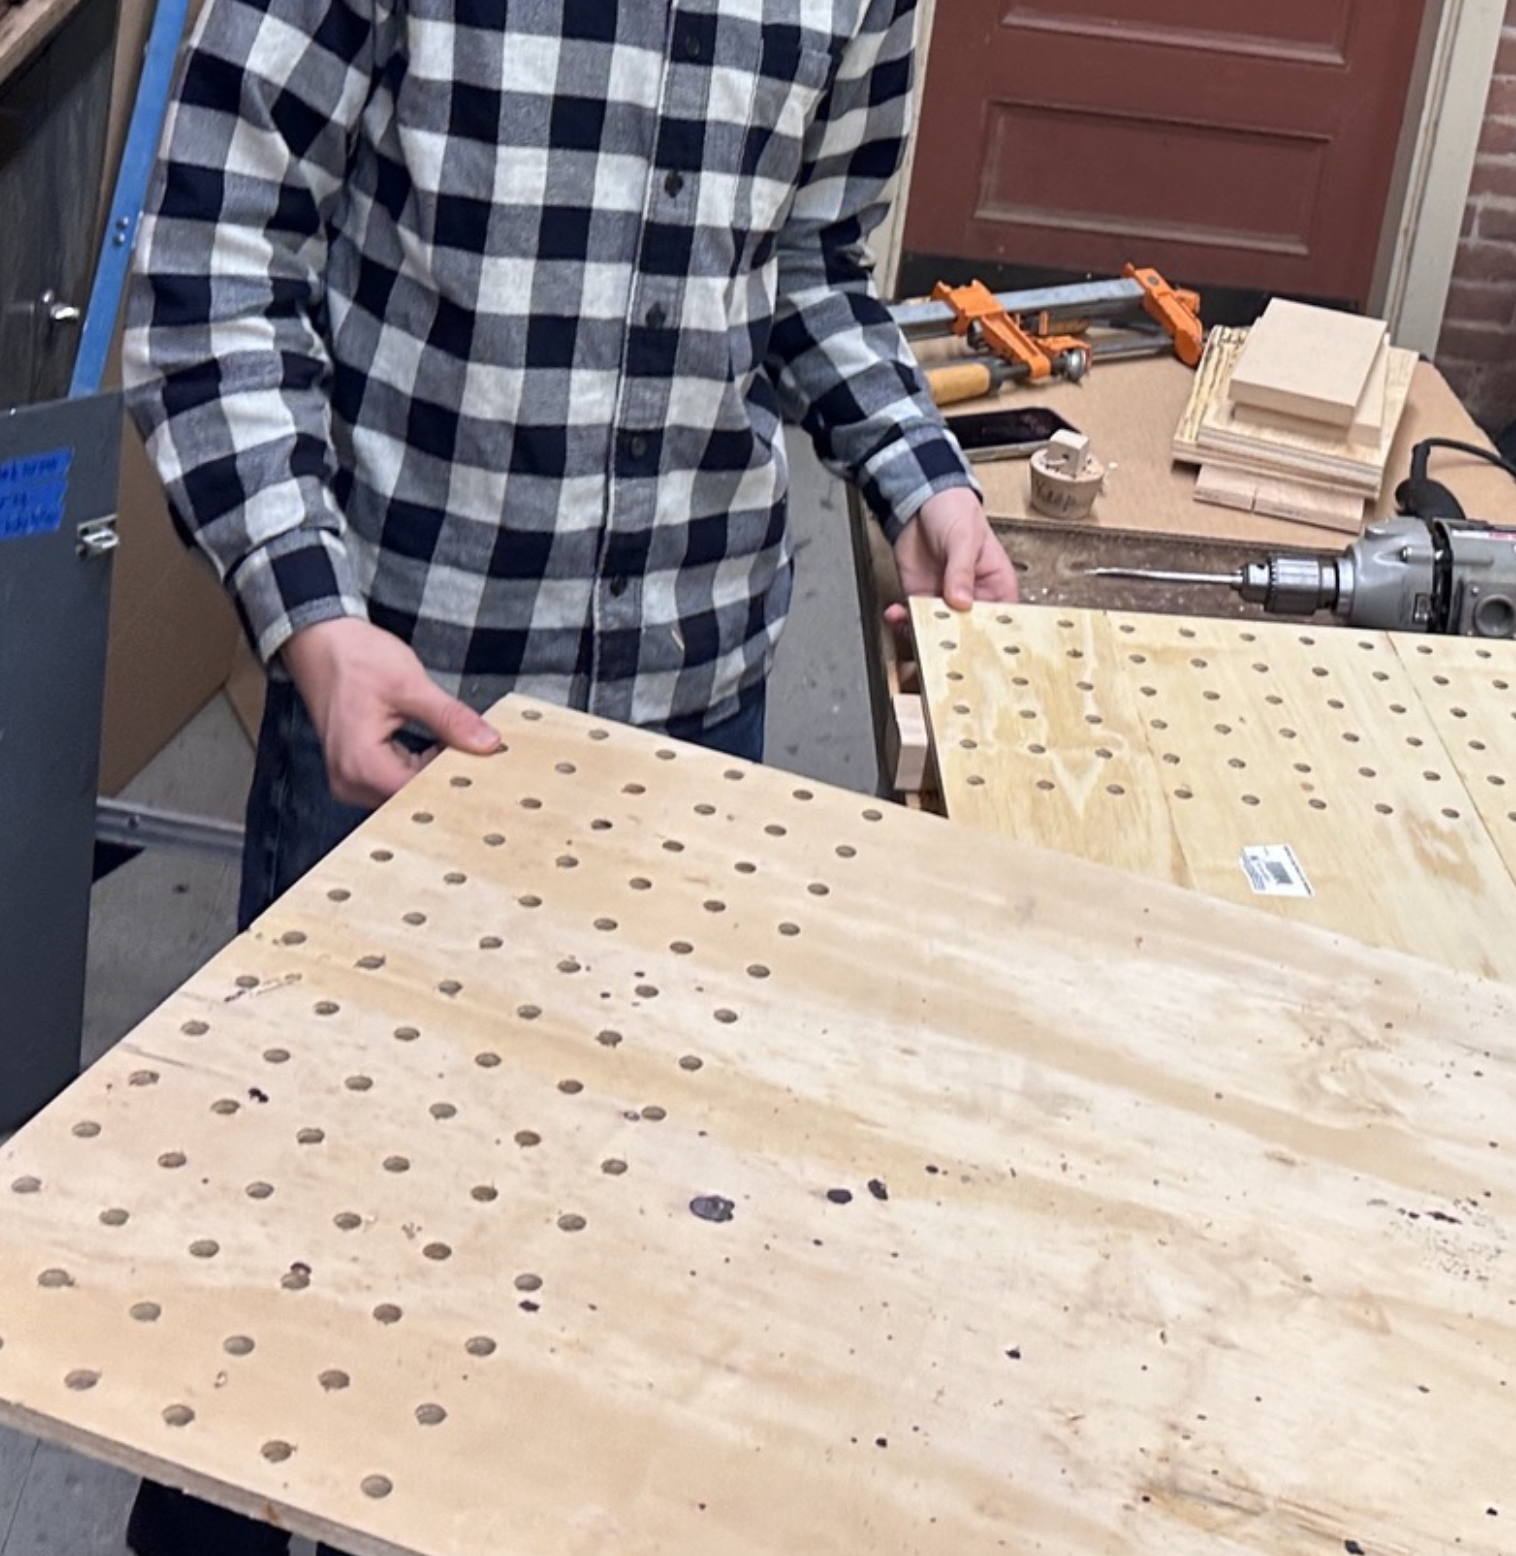
CNC as a Template
The test print on the CNC became a template for the other boards, allowing us to drill into other boards by hand. By placing the boards on top of each other, the holes could be transferred with the correct spacing to a new board!
Over the next week, we spent hours doing the same repetitive task.

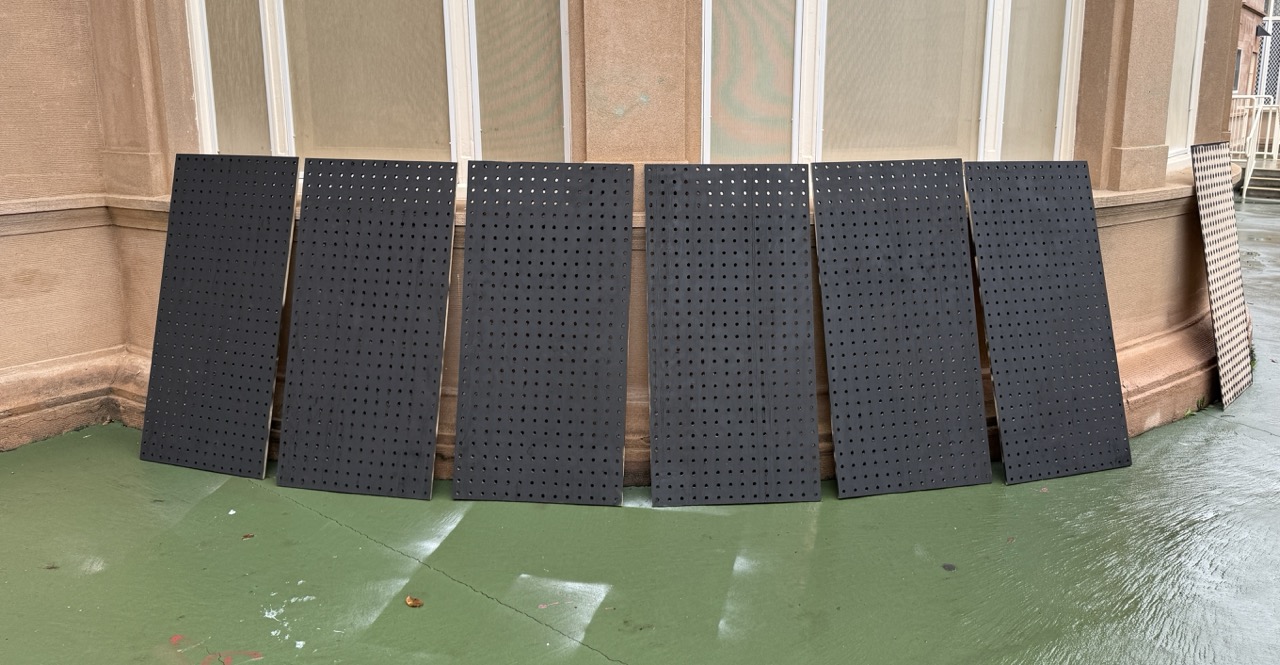
Painting
We then spray painted the boards matte-black, and definitely didn't accidentally spray paint one of Stanford's tables.
Would highly recommend using actual roll-on paint next time, as this was quite expensive.
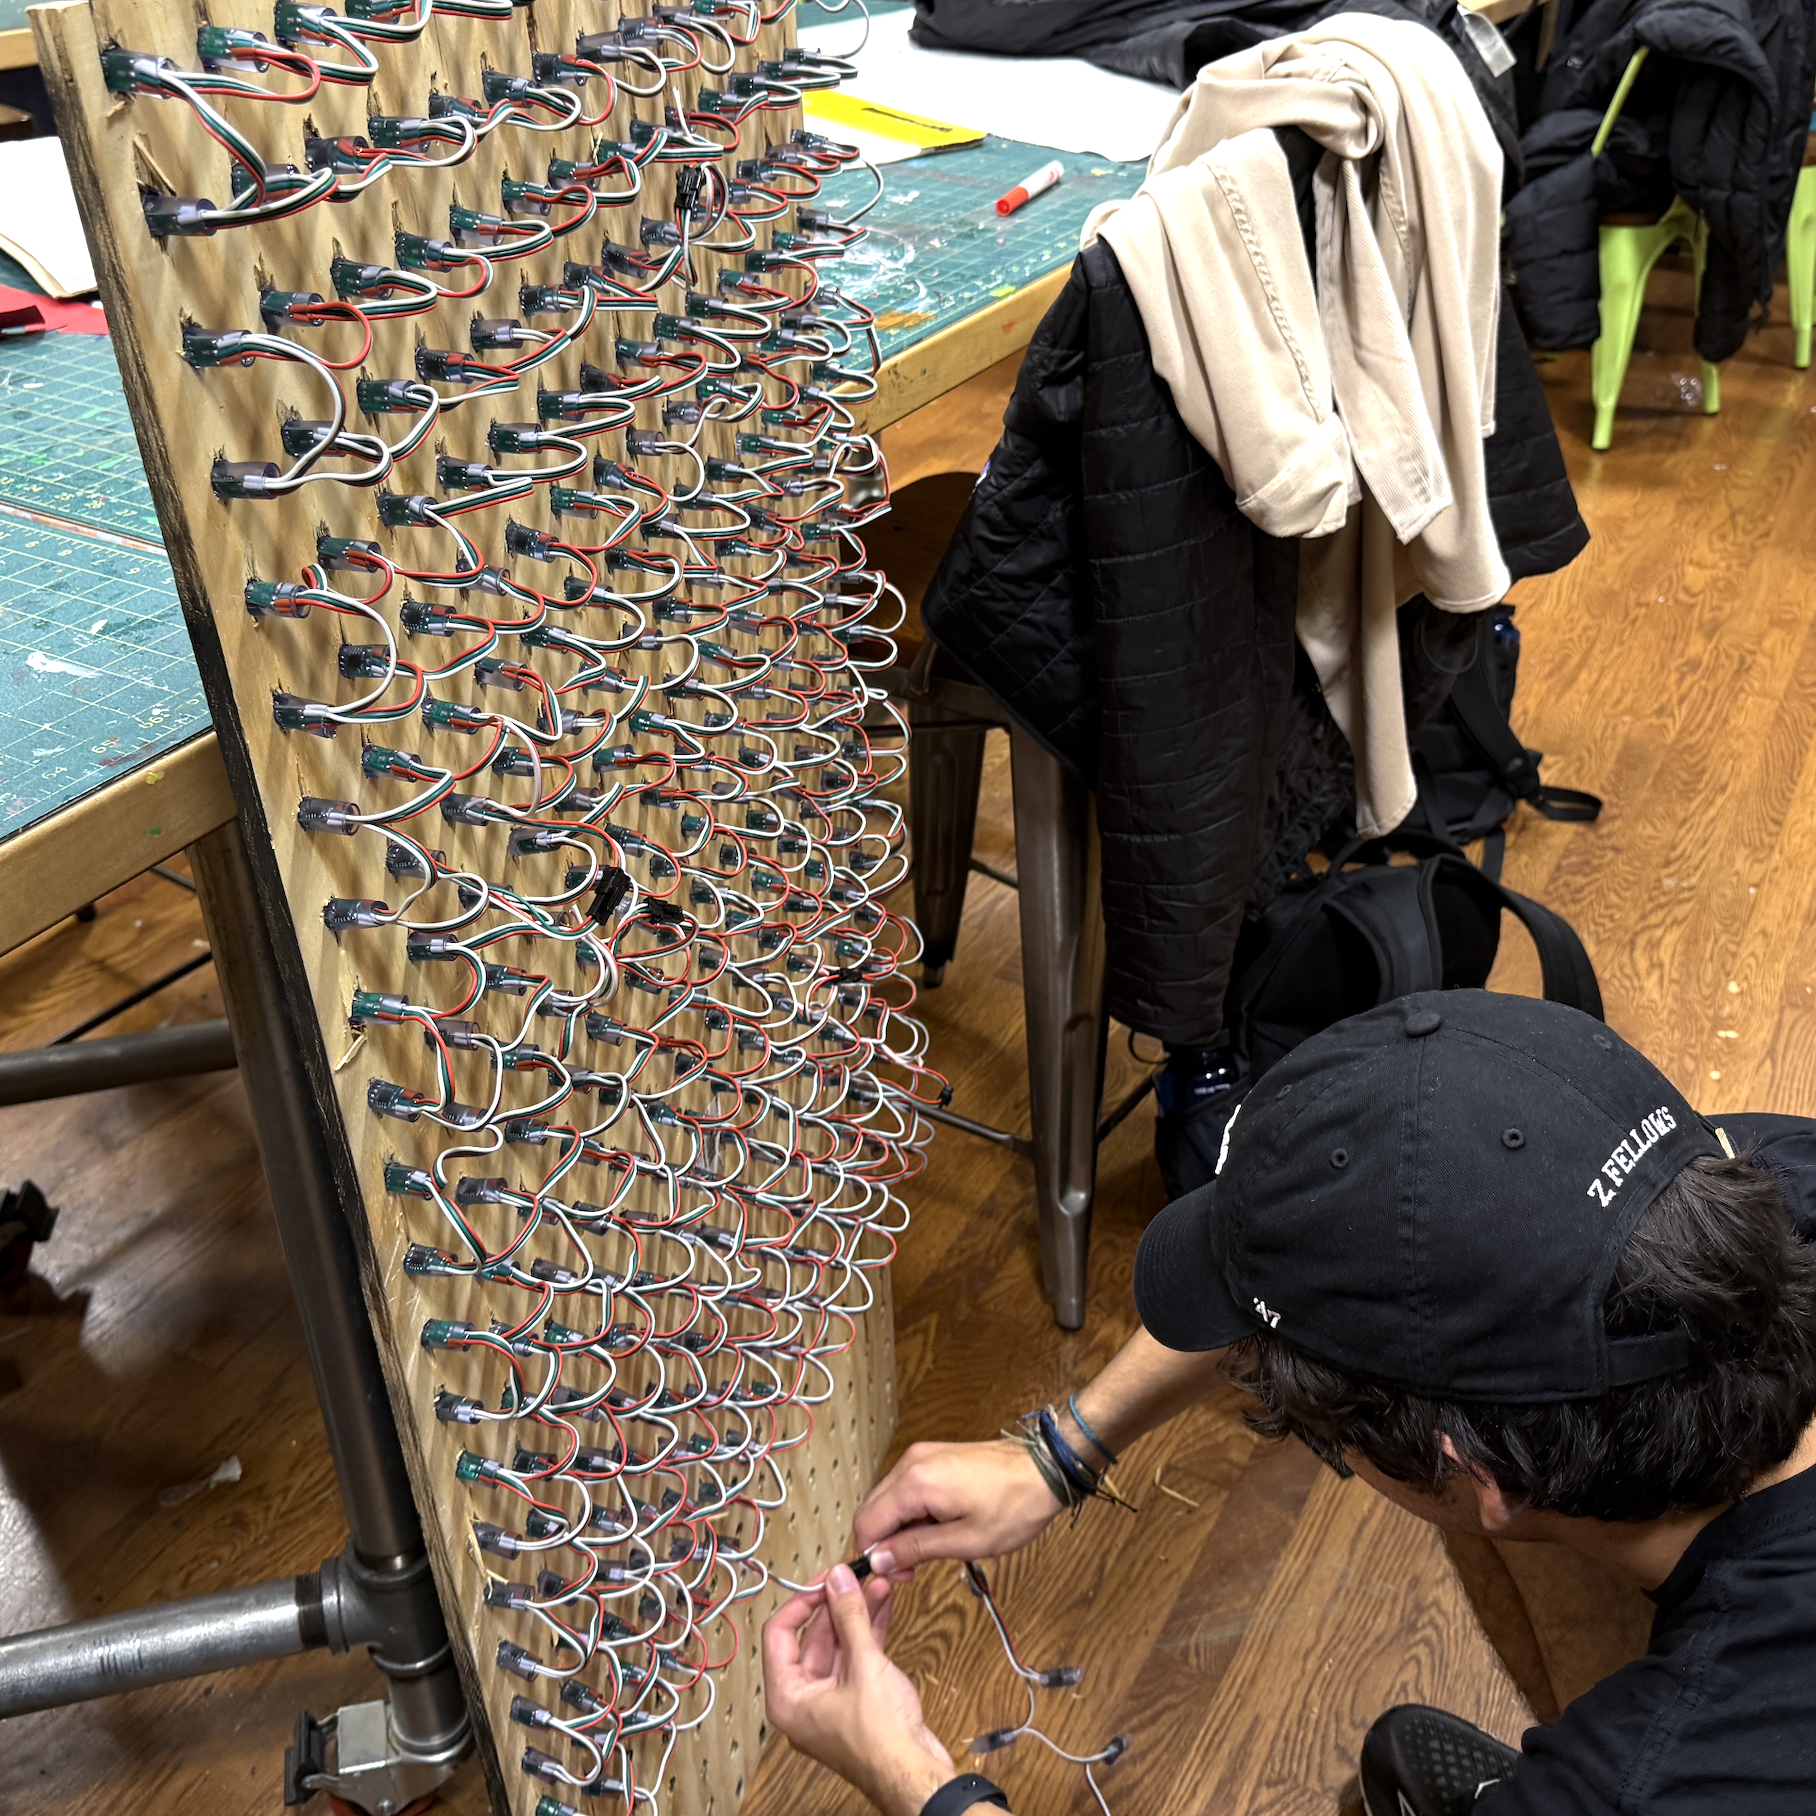
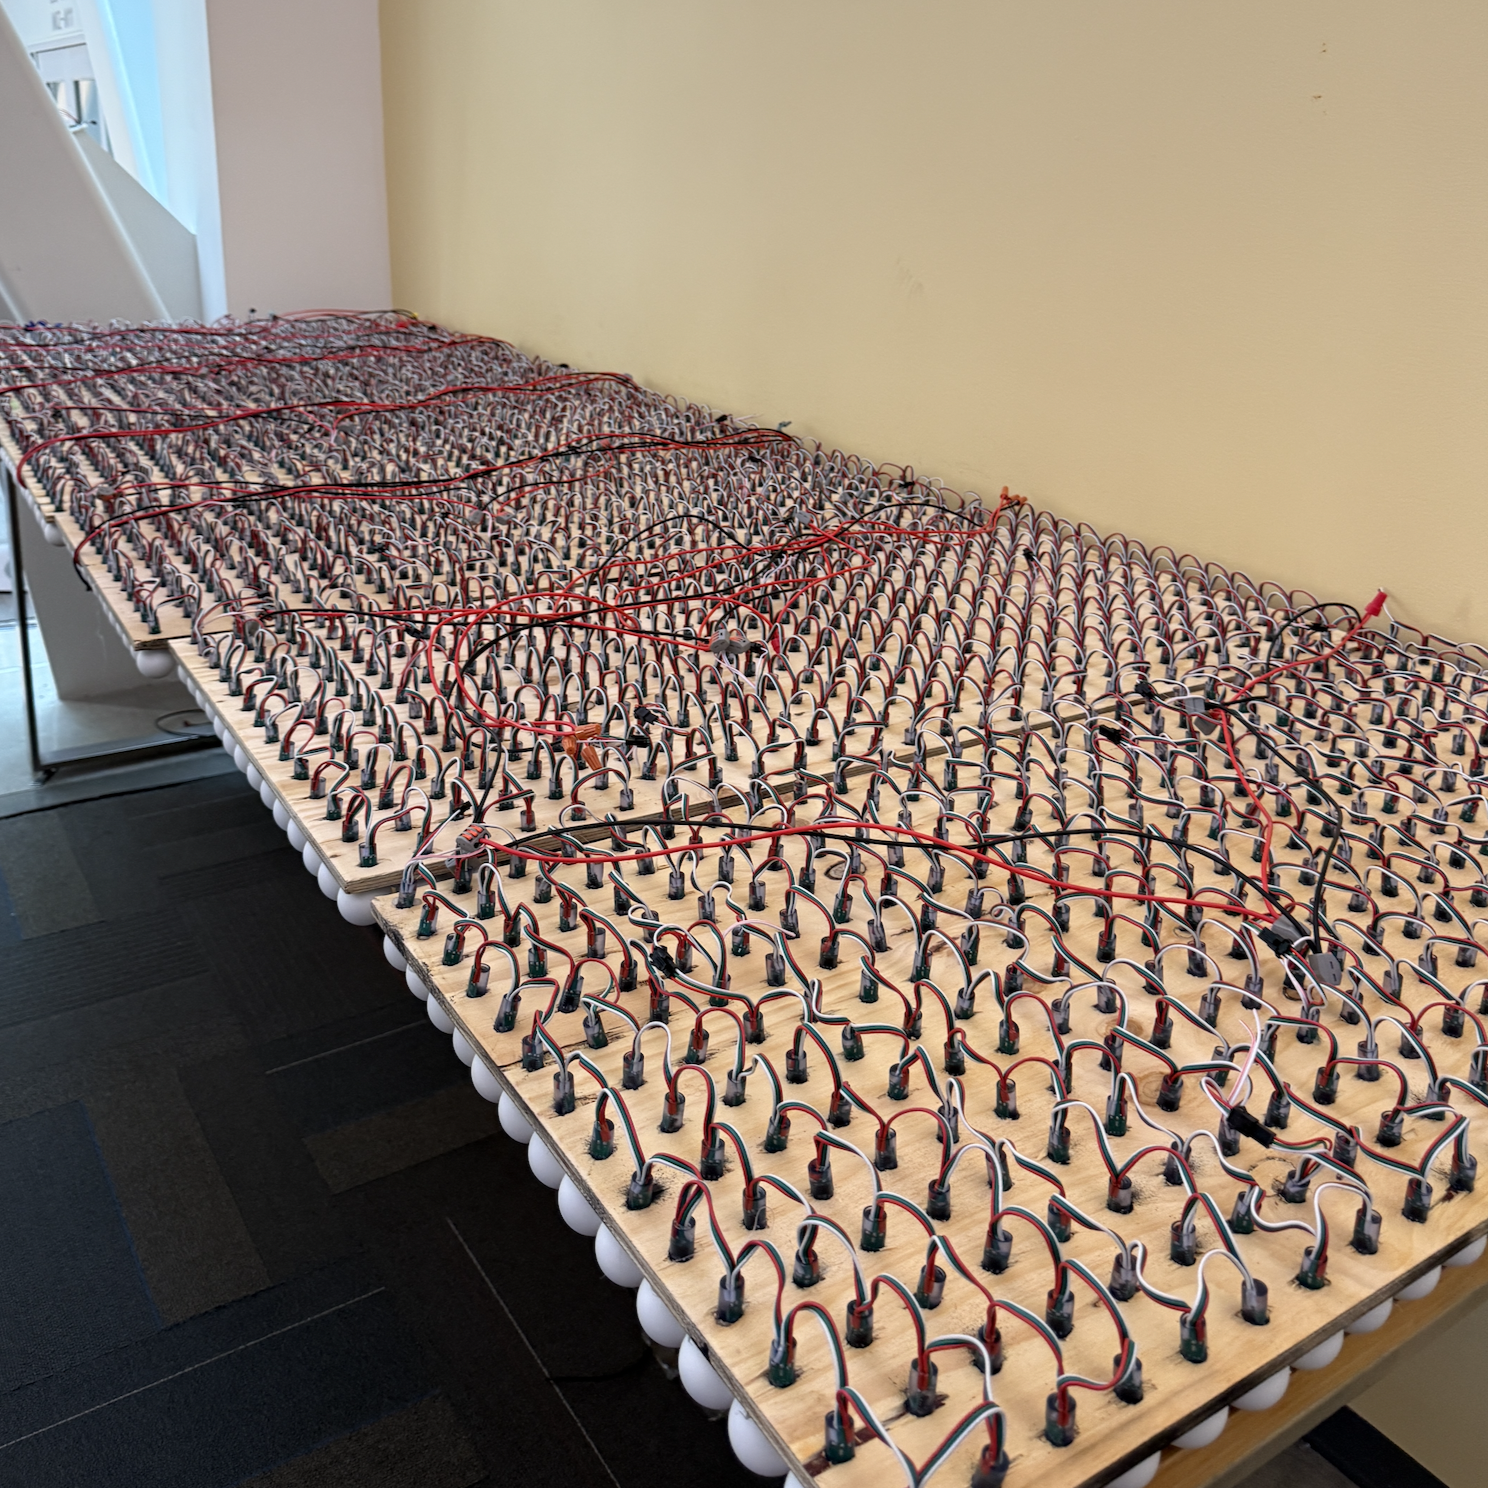
Attaching the LEDs
The next step was to stick all of the individually-addressable LEDs into the board! We got our LEDs in bulk from AliExpress.
I swear the pain in my fingers lasted over a week after repetitively sticking these LEDs with sharp edged into holes that were barely large enough to fit them.
We put all of the LEDs in a “serpentine” back-and-forth pattern, which is important to do consistently, as it defines how your indexing function will work in the code.
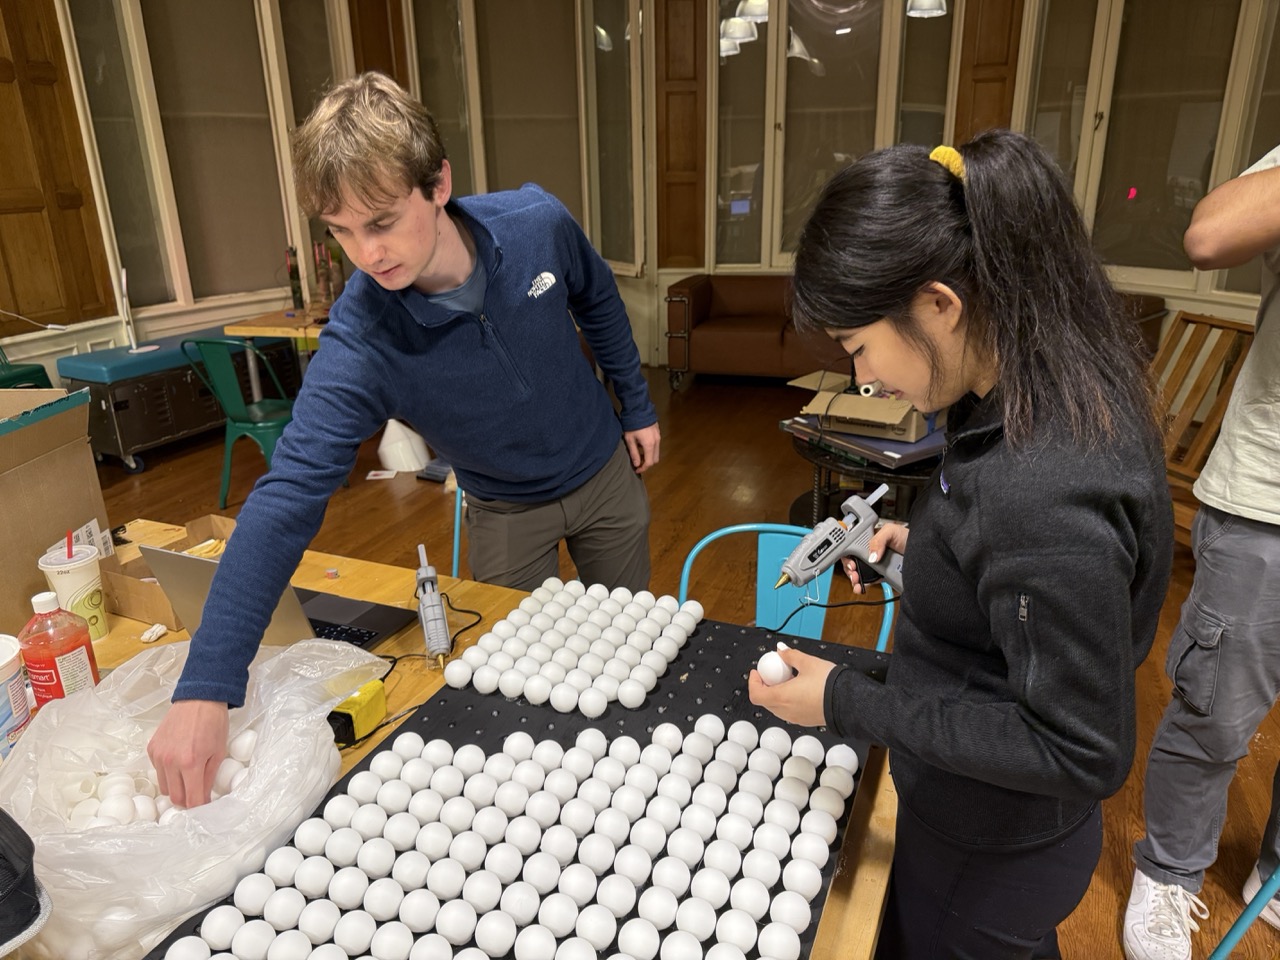
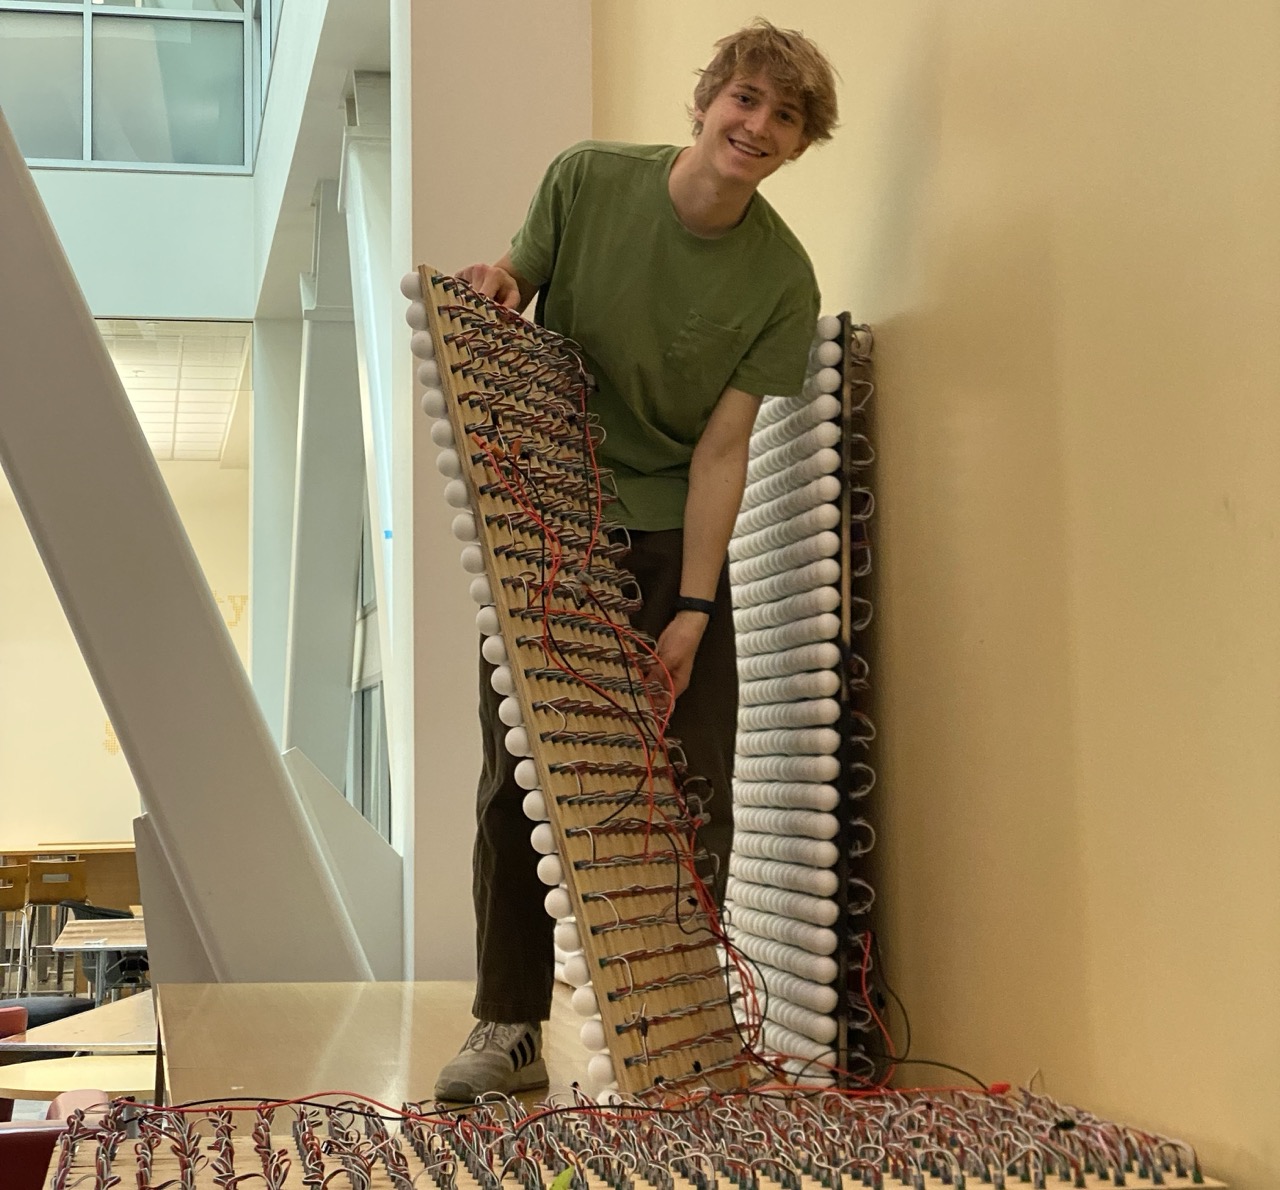
Ping Pong Balls
To attach the ping pong balls to each LED, we had to melt a small hole into it for the light to fit in. Hot glue guns aren’t hot enough, so we ended up using a soldering iron.
Even though attaching LEDs or melting holes in ping pong balls seem like quick tasks, everything had to be repeated 2352 times.
This took hours, of course, and resulted in a few burn injuries from melted plastic spraying around from the pressurized interior of the ball.
The material and thickness of the ping pong balls changes the overall time spent on this step drastically, so I recommend finding the cheapest ones in bulk on Amazon or Aliexpress.
We then hot glued them onto the wall using a 3D-printed template to keep even spacing.
Wiring & power delivery
If you're looking to build one of these yourself, this is probably the section that'll be most useful to you. This is where we ran into and solved all of the major challenges with powering this many lights.
We used 5V WS2811 LEDs
Max power
The first surprise was the amount of power our system would need to provide. Each LED can draw 50 mA at max brightness (all white).
50 mA × 2352 = 117 A
We decided to be a little more conservative and use a 70A power supply instead
Delivering current evenly
There are two important things to consider here.
First, WS2812B LEDs are wired in series, meaning the lights will get dimmer as you get further from a power source.
Here you can see the brightness drop when further from the power rails. White turns into red, as the blue and green require higher voltage to show.
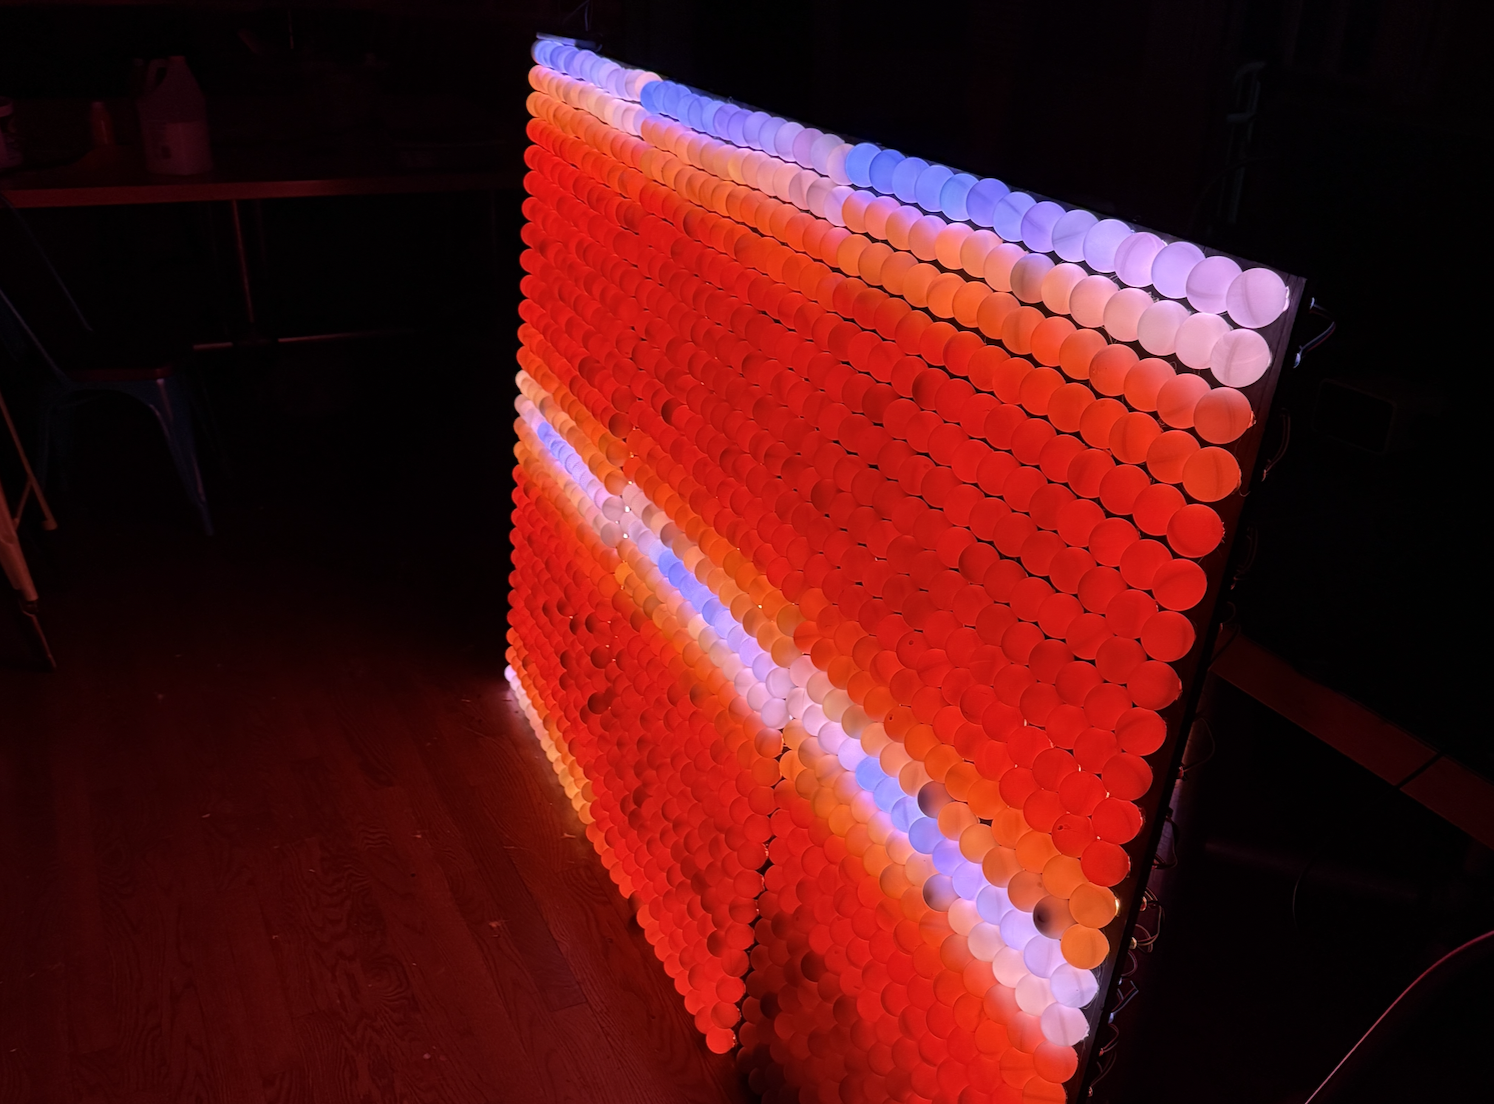
To solve this, you need to inject current in multiple places throughout the display.
Second, the wires in the LED strings are incredibly thin and cheap. These can't deliver much current at all.
These two factors required us to build this system for injecting power at three points in the display. In fact, at full brightness, this isn't even enough. You might need five or more to have consistent behavior.
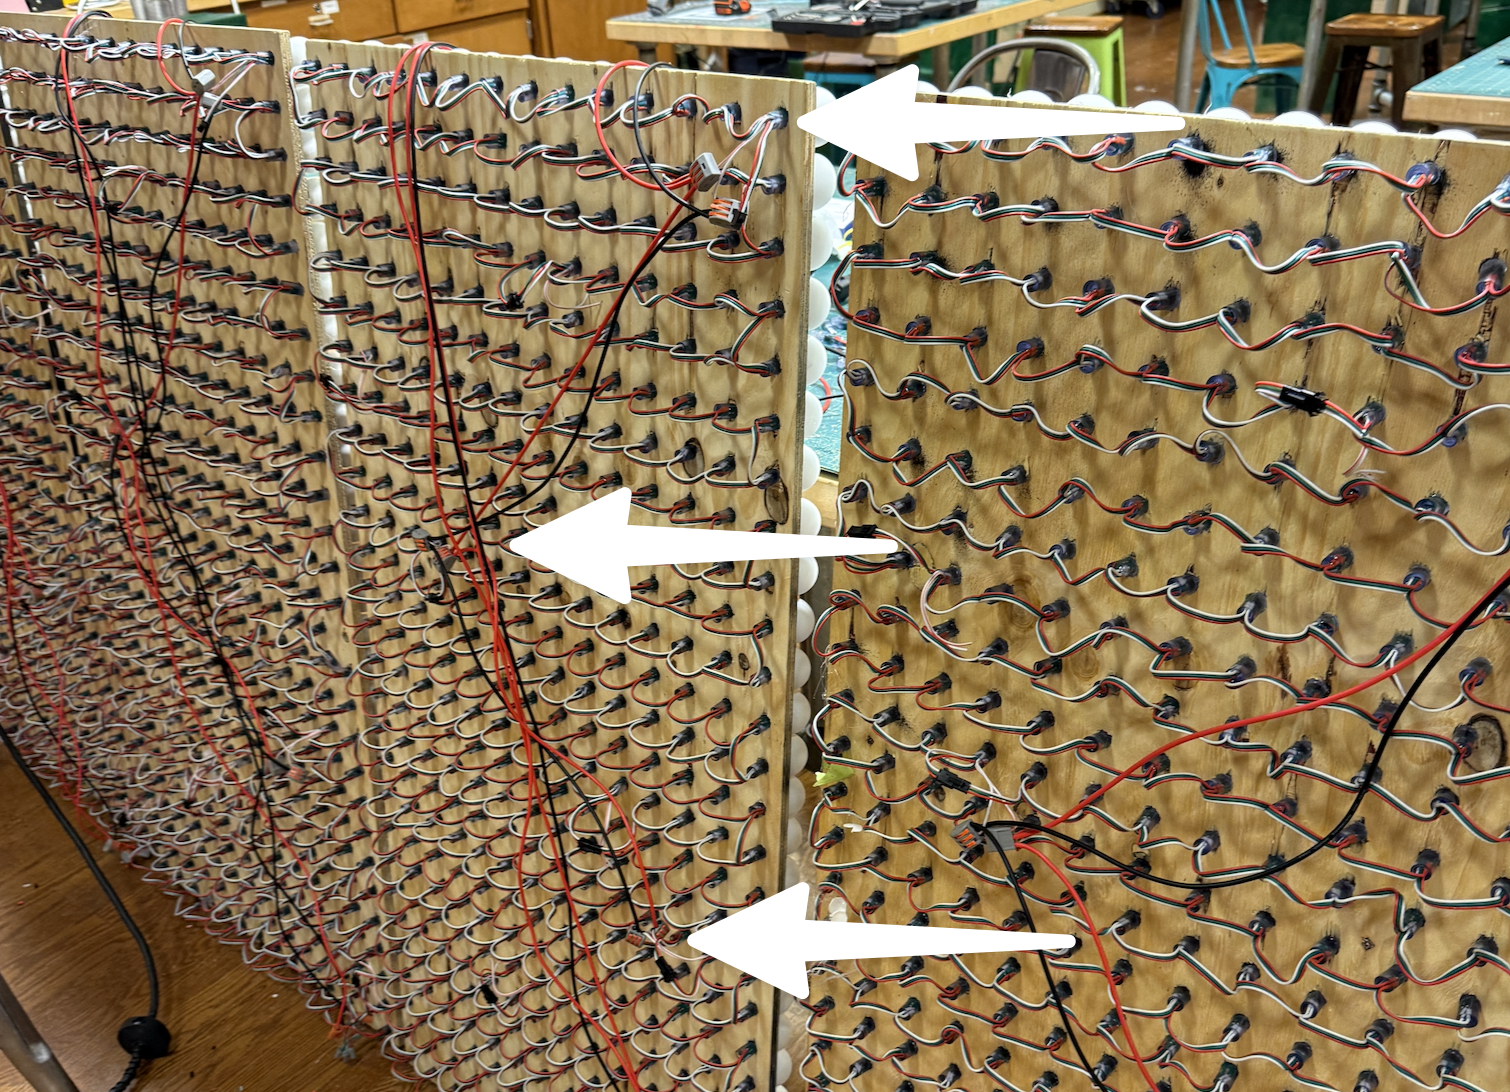
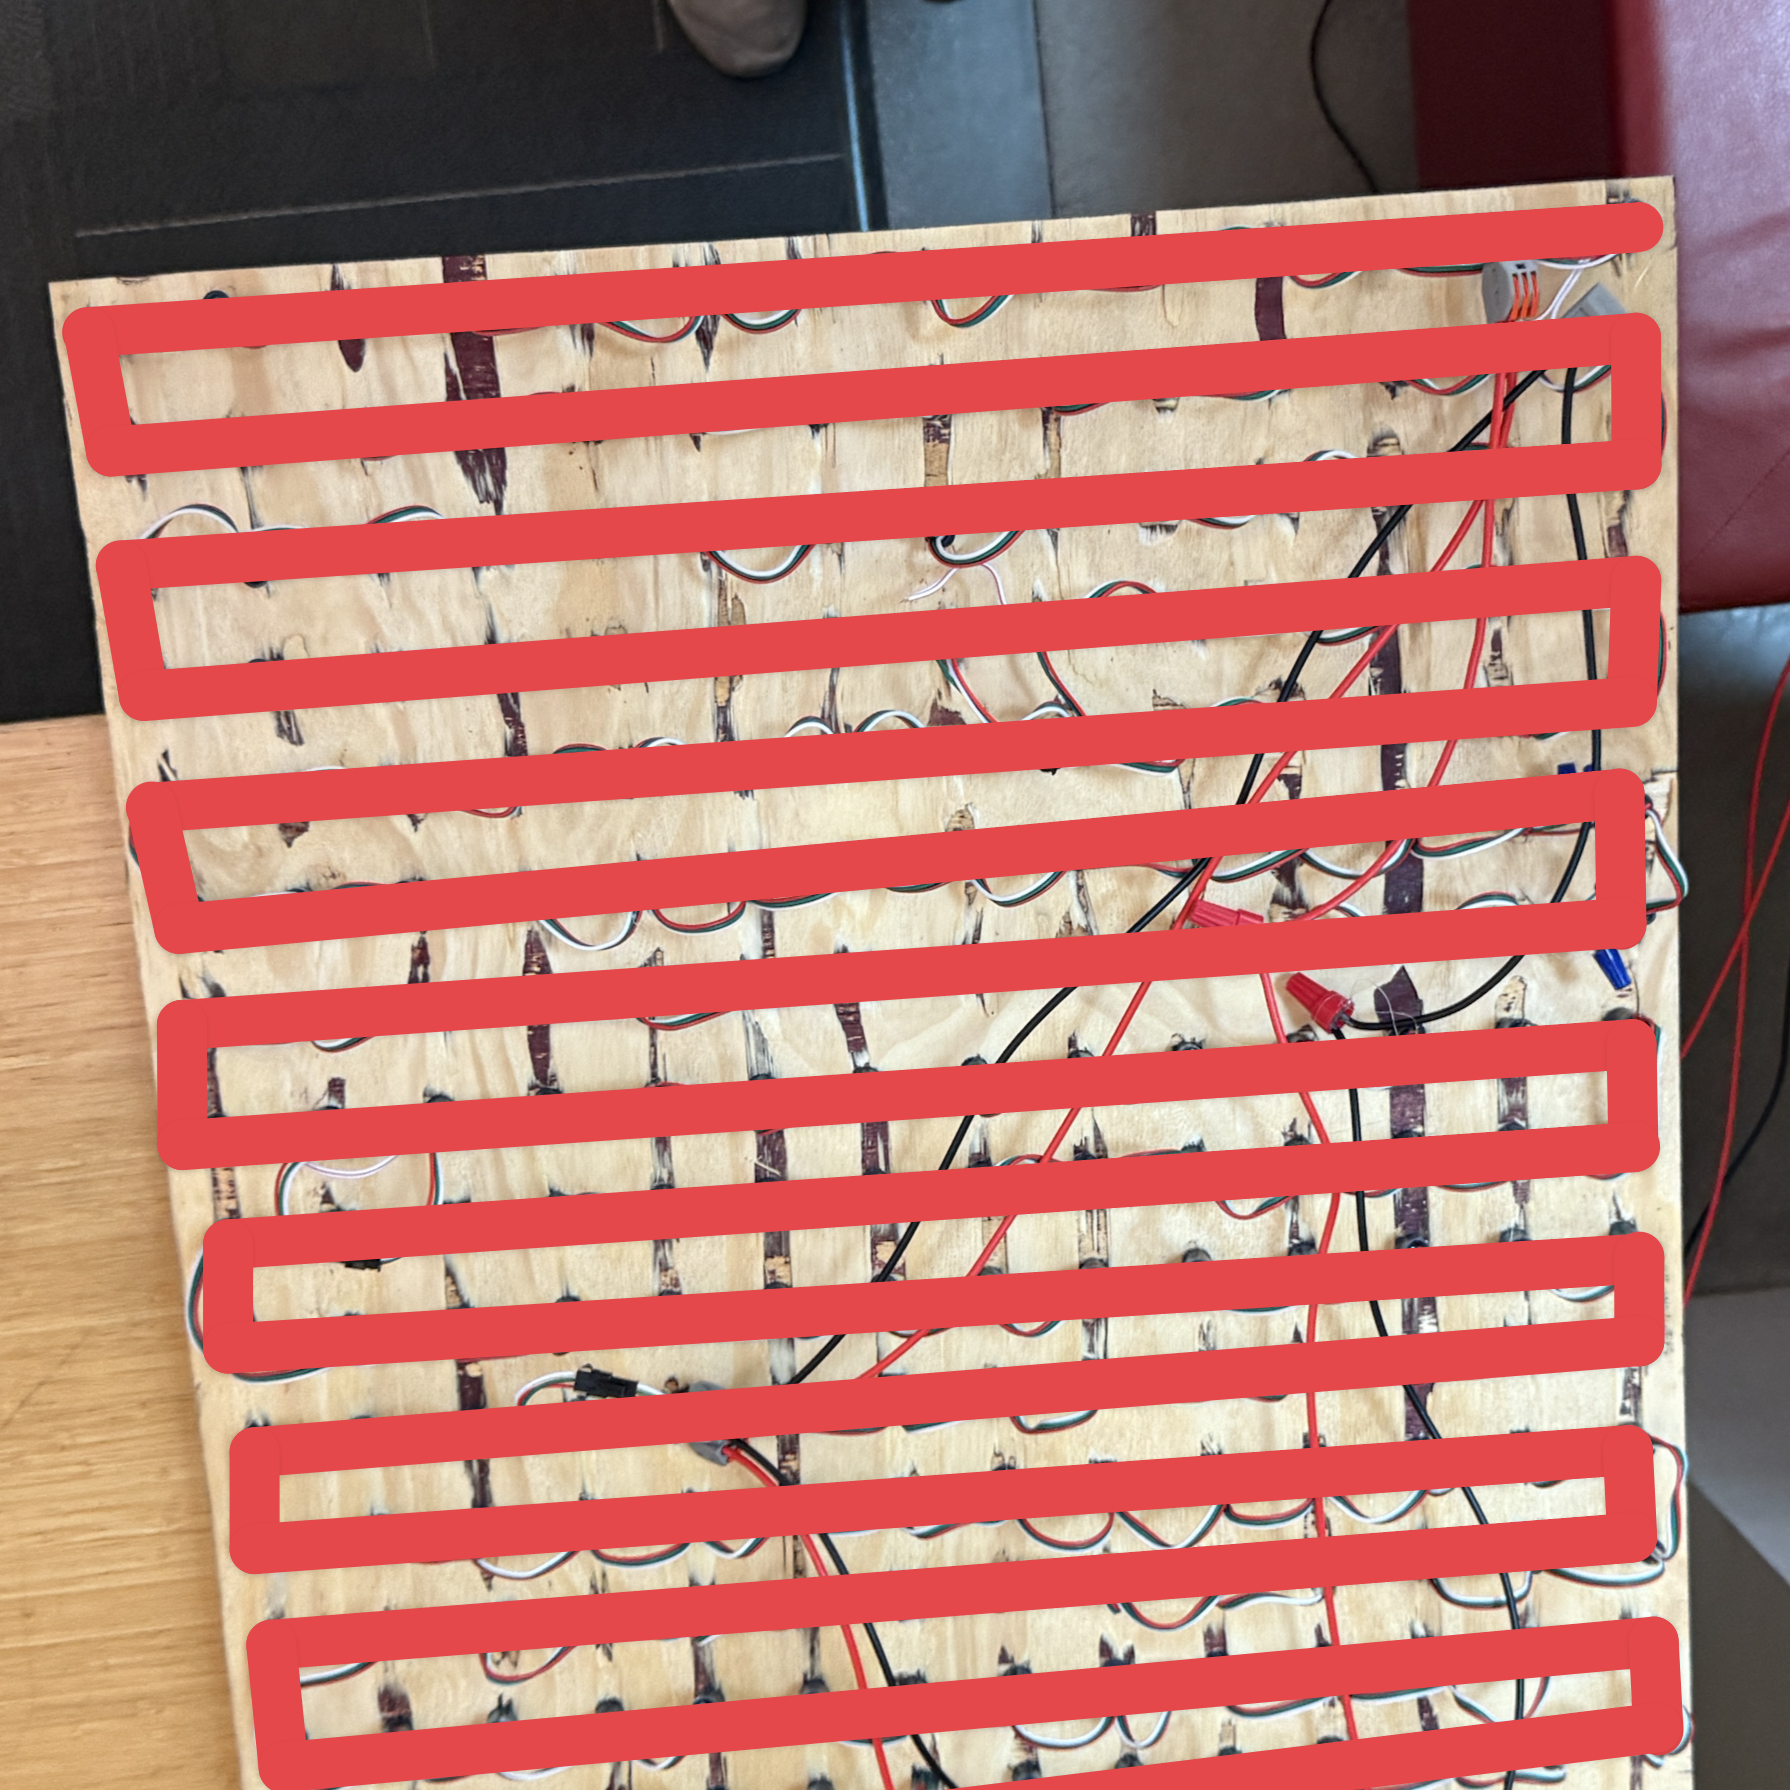
Wiring effectively
The best decision I've ever made in my entire life was to use wire connectors and not solder anything. With so many connection points, this was a godsend in putting things together quickly.
Make sure your connectors are rated for enough current!
Programming it!
You might be surprised, but this entire display is controlled by a single ESP32!
ESP32s are quite powerful actually, with 520kb of memory. May not seem like a lot, but an Arduino Uno has 260x less, with only 2kb.
That's plenty to store the state of all of the LEDs with the FastLED library.
FastLED is pretty low-level, so we used adafruit-gfx with a FastLED_NeoMatrix compatibility library to draw more complex shapes.
Since the LEDs are in a series numbered 0 - 2351, the other important task in FastLED is writing an indexing function to convert an x and y value into a specific LED. Shobhit wrote this awesome indexing function for this!
We connected to WiFi, then fetched time from an NTP server.
You can find all of our code for this here on GitHub.
Putting it all together
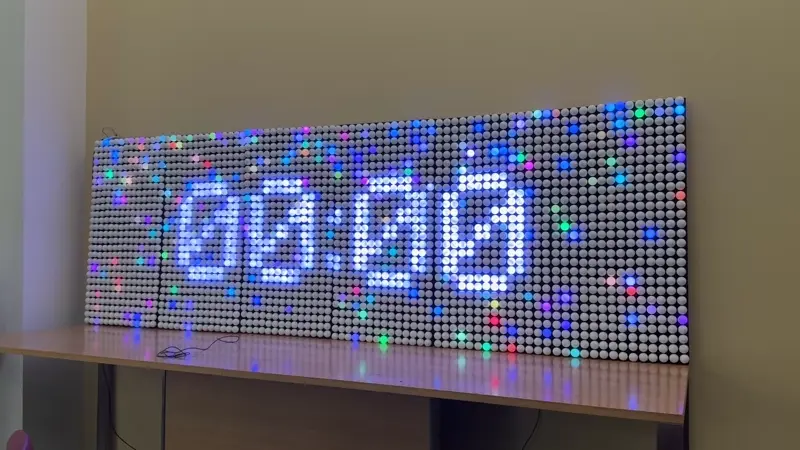
Since we split the entire wall into panels, and were using wire connectors, we were able to easily attach them on event day. This modular system worked out really well!
The final product